
We built it, now we need to make it go, right?
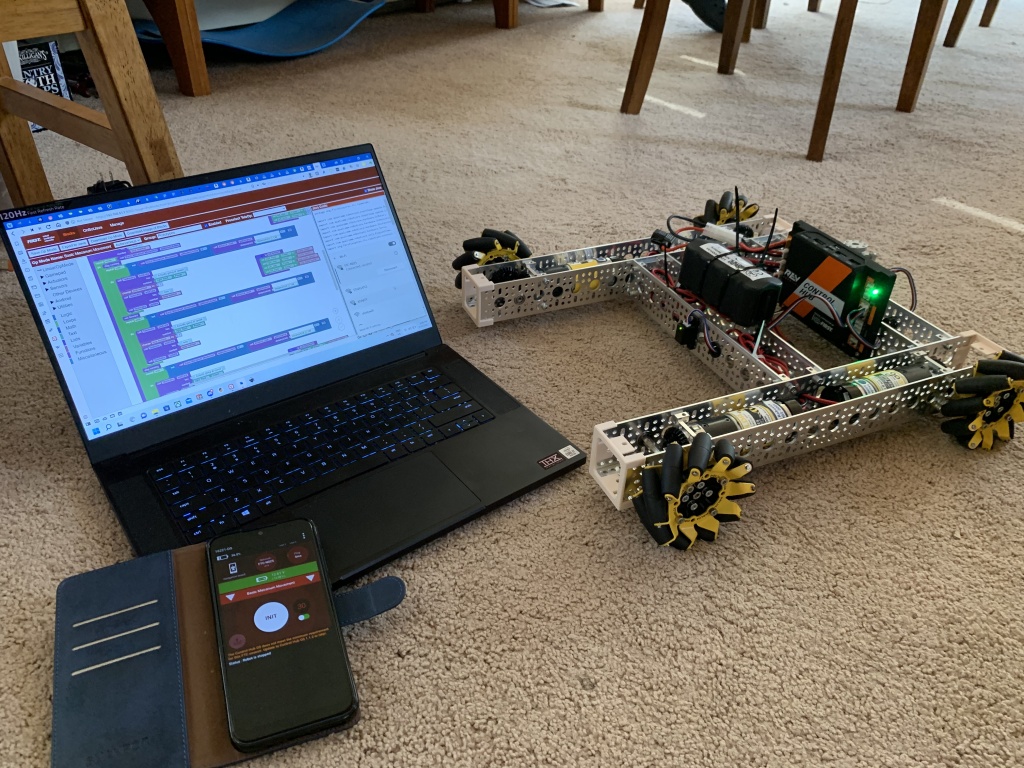
Our Navigation platform (how about “navbot” for now, at least until we name it properly – eh, Team?) consists of the goBilda mecanum “strafer chassis” with two REV distance sensors. We will add another two distance sensors before we are done, and a USB camera on a swivel mount, but that’s an upcoming project yet.
So we have a chassis and a couple of sensors to work with. No big deal! We pull up Blocks for this, and get it moving… why isn’t it moving?
So despite the fact that we are programming in blocks, guess what? We actually still need to know what we are doing. The motors still need to be properly initialized before they will run. Turns out that blocks can actually teach you real programming- who knew? We set the motors’ run mode and direction, making an initialization routine.

We put the chassis up on a book before trying to actually run it on a surface. Lifting the wheels off the ground allows them to run without spinning the navbot in circles – because the way the chassis is hooked up, the right-hand motors spin backwards from the left-hand motors. With that fixed in our code, we made a routine to run forwards, a routine to run backwards, and a routine to stop. Something like this (only in blocks, which are prettier):
private void run_forward() {
    right_front.setPower(motor_speed);
    right_rear.setPower(motor_speed);
    left_rear.setPower(neg_motor_speed);
    left_front.setPower(neg_motor_speed);
  }
There are two ways in which we could have fixed the wheel direction. One way was to set the direction on the left hand motors to REVERSE; the other way is to set the power to negative values. We chose the latter method.

The next step was to involve the distance sensors. We decided to have it run until it came close to an object, then stop. So, in pseudocode:
run_forward()
do
   just_output_telemetry()
until (sensor.distance <= 30cm)
stop_running()
We had fun almost running into the dog (and he got very nervous) a few times, then added in the other direction. Since the front sensor is in the middle of the robot and the rear sensor is at the rear edge, the distance was adjusted to suit:
run_backward()
do
   just_output_telemetry()
until (sensor.distance <= 10cm)
stop_running()
You’ll notice that we actually wait to make sure that we’re not already less than 10cm from something before we run backwards. We do the same check before running forwards. So the full loop is:
wait until front.distance > 30cm;
run_forward;
wait until front.distance <= 30cm;
stop_running;
wait until back.distance > 10cm;
run_backward;
wait until back.distance <= 10cm;
stop_running;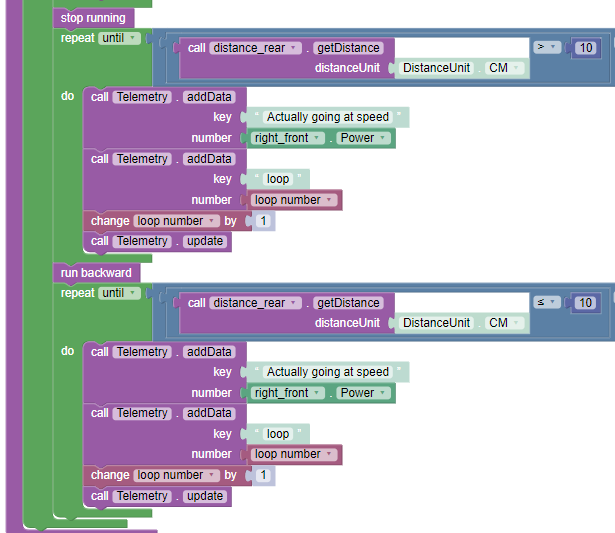
So it’s not very smart yet, but now it goes back and forth like a pendulum-on-wheels.
Up next: the camera! Stay tuned.
