Post-Competition Update: UVM Invitational 2025

Team members make last-minute adjustments to robots Cordelia and Fred.

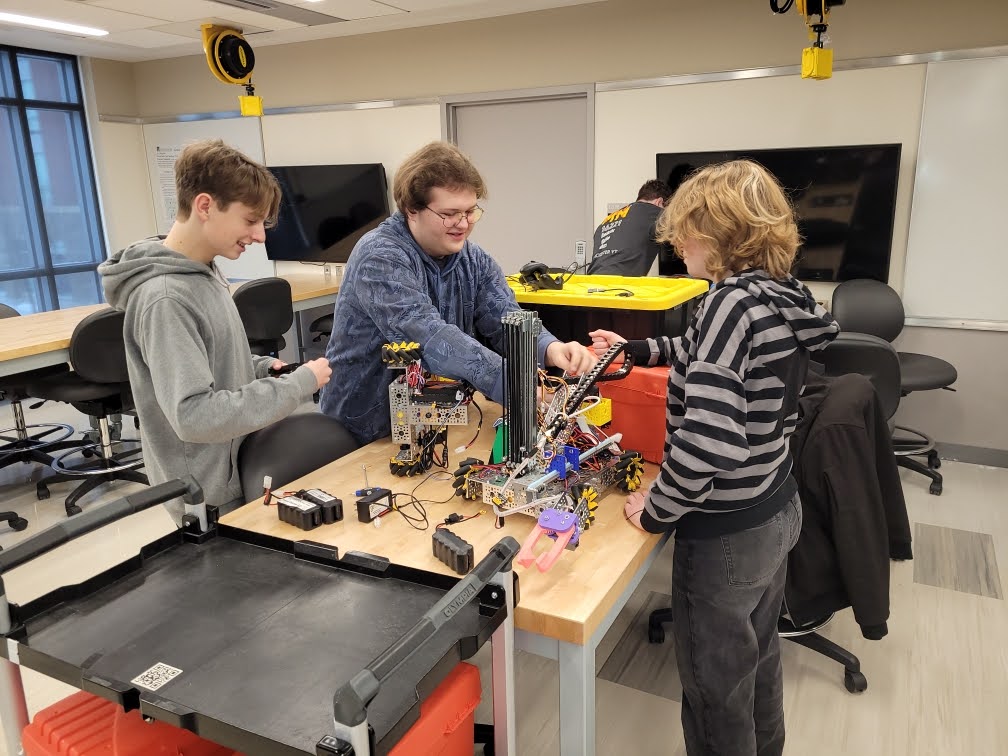
On Saturday, January 11, 2025, we went to the invitational scrimmage hosted at the University of Vermont. Our team has collaborated with another southern Vermont team, Bennington’s Cookie Clickers, this year, but this invitational served as a good chance to get to collaborate with everybody, as we don’t get many opportunities to work with teams from northern Vermont. This year’s challenge is rather complex, and to our surprise we saw that many teams had similar solutions to the challenge. A frequent design that we saw — and the one that we chose for our robot — is a linear slide system to allow the robot to reach this year’s higher scoring bins. Despite many robots having a similar base idea, it was interesting to discuss the smaller differences between every robot. We saw, for example, a number of different claw designs and strategies for how to pick up game pieces. We discussed with different teams about how they designed their claws, and we found things we hadn’t even thought of such as having the claw aligned horizontally rather than vertically.

After we compared our designs, it was time for a round of judging! Many of us hadn’t experienced a judging session before, so it was a great practice for the new members. We discussed our process in designing the robot and our current hardware, as well as our intended strategies. We started the presentation with a strong overview of our different hardware mechanisms, featuring our linear slides, rack and pinion servo, and our wrist and claw mechanism. To follow up our hardware presentation, we discussed our developments in our robot’s software this year. This year, we started by integrating the PedroPathing algorithm for pathfinding, a departure from our previous strategy of writing everything ourselves. Later in the season, though, we found that PedroPathing’s (at that time) lack of a proper Gradle library, and our lack of proper knowledge of the internals, was holding us back. So, at the last minute, our software lead sat down and wrote a block-based pathfinding autonomous, combining ideas and routines from previous seasons, which worked brilliantly. In the presentation as a whole, something that we plan to improve is how we distribute the information presented between team members; some spoke too much, others not at all. Our presentation was decent overall, though, and we have definite targets for improving it.

The last part of the invitational that we were able to attend was the practice matches, which led us to useful discoveries about our robot as well as potential game strategies. The scene was set: our robot waited, ready for action, on the full-sized playing mat, with the other teams standing ready. The suspense grew as the referee counted down the seconds to the moment of truth. Then, as the autonomous portion began, our robot was the only one that moved. We came to the realization that we were the only team with the foundations of a working autonomous. Our autonomous wasn’t anything too fancy yet, as it was just a simple parking mechanism we had recycled from a previous year, but nonetheless we managed to scrap it together for this season. The tele-op portion of the game, though, was a bit more interesting, as all teams had some sort of prepared tele-op system. Many different game strategies were used, but the main one that we saw was the usage of baskets. Our team designed our robot to be able to both score a basket and score specimens on the rungs of the submersible, so we were flexible with our scoring techniques. We tried a variety of different scoring methods, but we focused on getting better at hanging specimens, as the other teams wanted to prioritize basket scoring. We ran into a few technical problems, such as the traction of the claw not gripping pieces fully, though we hope to fix those in the coming days. The last part of the match struck and we raced over to the ascension zone, unrivaled again. In the final section of the game we discovered that we were the only team able to complete a level two ascent, which shocked us again as our ascension system used a similar design to many other teams’. 

After some matches, we discussed claw designs with another team, along with the benefits of a horizontal claw versus our vertical claw. They showed us that they too had a vertical claw at one point, but got rid of it because after running some tests the horizontal claw proved to be more effective in sample collection. We hope to re-think our claw to make our collection easier. Since they were nice enough to help us out with our claw design, we helped them out with their difficulties with ascension. They also used a linear slide system to reach the higher collection bins, so we discussed how they could repurpose their slides as an ascension mechanism like we did. It was fun and constructive to provide feedback for each others’ robots, and, overall, we gained a lot of insight and ideas from our discussions. We hope to implement what we’ve learned as we continue to improve our robots, and to continue connecting with other teams to learn as much as we can. These collaborative events allow us to gauge our progress and improve our designs much more than we would be able to do otherwise. As such, we’d like to thank UVM for providing this incredible opportunity for all Vermont teams. 

Overall, we are proud of where we are as a team and are on track to perform well in the state competition. We want to go as far as we can, and achieve the best we are capable of. We’re in a good place for this point in the season, and we hope to progress to regional competitions in Massachusetts again as we did last year.

FIRST Global Inclusivity Conference 2023: A Report

Last weekend, a couple of our team members attended the 2023 FIRST Global Inclusivity Conference, hosted by team 5773 Ink & Metal in San Francisco, California. There were a wide variety of teams and mentors from several different countries in different parts of the world, and we all presented our teams and then talked about problems we were having. Then, we talked with mentors (some of whom were in the official FIRST organization) in order to get advice about our robot, our process, our designs, and our team.

Java Reflection Tutorial, Part 2: Annotations

Welcome to Part 2 of the Java reflection tutorial. This part will focus on annotations, which allow arbitrary data to be attached to a class, method, field, or any other symbol.

If you have not yet read Part 1, please go read it. It explains some basic concepts.

Now, without further ado…

Getting Started

This tutorial assumes that you have Basic.java from part 1. If not (I don’t), here it is:

import java.lang.reflect.*;
import java.lang.annotation.*;

public class Basic {
    public static void main(String[] args) {
        // SETUP //
        System.out.println("Hello Java Reflection");

        // GETTING THE NAME OF A CLASS //
        Class<?> cls = Basic.class;
        System.out.println("The class's name is " + cls.getName());
        
        // GETTING THE NAME OF A METHOD //
        Basic basic = new Basic();
        basic.doSomething("whatever");
        try {
            Method doSomething = cls.getMethod("doSomething", String.class);
            System.out.println("The method's name is " + doSomething.getName());
        } catch(NoSuchMethodException e) {
            System.out.println("A whatsit happened: " + e.toString());
        }
    }
    public void doSomething(String whatever) {
        System.out.println("Doing something very interesting...");
        System.out.println("Whatever is " + whatever);
    }
}

Now, let’s take a look at annotations.

Built-In Annotations

Java has several built-in annotations, including @Override, @Deprecated, and others. Let’s take a look at @Override first.

@Override allows you to override previously defined methods. For instance, if you had a class called Class1 (very creative name, isn’t it?):

public class Class1 {
    public void doSomething() {
        System.out.println("Hello world, Class1 style!");
    }
}

Then, say that you had a class called Class2, which extended Class1, and you wanted to define anew the doSomething method. You might take a gander at it like this:

public class Class2 extends Class1 {
    public void doSomething() {
        System.out.println("Hello world, Class2 style!");
    }
}

However, you would be gandering at hot air, and the compiler would scream loudly at you for it. Don’t do that. In Java, you need to annotate any overridden method with @Override, like so:

public class Class2 extends Class1 {
    @Override
    public void doSomething() {
        System.out.println("Hello world, Class2 style!");
    }
}

As you can see, using an annotation is very easy: Just smack it down in front of the thing you want to annotate, and you’re off to the races.

And now, you can go and enjoy your polymorphic “Hello, World” in peace. But don’t go away just yet, because there’s more coming. Unless, of course, you’re bored out of your mind, in which case you would probably prefer some of the other content on this site.

An important note: @Override is not needed when overriding methods defined in interfaces or abstract classes. Those are meant to be overridden, and so the all-knowing Oracle realized that it was redundant to mandate that people specifically denote that they’re overriding something which cannot be used in any way except being overridden.

Anyhoo, now we move on to @Deprecated.

(looks up what @Deprecated actually does)

@Deprecated marks a program element (e.g. package, class, field, method, etc.) as deprecated. If you try to use a deprecated field, the compiler will give you a warning.

To use it, just put it in front of just about anything, like @Override:

@Deprecated
public class DontUseMe {
    @Deprecated
    public void blowUpTheWorld() {}
    
    @Deprecated
    public String goodbyeWorld = "Goodbye, World";
}

Just in case it wasn’t obvious, now people know not to use that class.

This is just a small sample of the built-in annotations that Java provides. To see the full list (as of Java 8), see https://docs.oracle.com/javase/tutorial/java/annotations/predefined.html.

Creating Your Own Annotations

To create your own annotations, use an @interface block. Not an interface, an @interface. Each parameter for the annotation is defined as a method in the @interface. For example, to create an annotation like the Author annotation in the official tutorial:

@interface Author {
    String name();
    String date();
}

And there you have it, a simple annotation. To use it, make sure it’s imported, and:

@Author(name = "Marty", date = "The Future")
// declare something here

Tip
If an annotation has only one method named value, you can pass it as an unnamed argument. For example, if @Author didn’t have date, and you renamed name to value, you could use:
@Author("Nobody In Particular")

Of course, you would probably want to make date into a Date, so that you don’t trip over unexpected time-traveling DeLoreans, but this suffices for a demonstration.

Now, this annotation can be used on everything at the moment — even the type of an argument. Since it’s kind of silly to put an @Author annotation on the type String, let’s fix that.

To restrict where your annotation can be used, you can annotate it (yes, you can put annotations on annotations) with a @Target annotation, in java.lang.annotation. @Target takes one argument, an ElementType or an array of ElementTypes. ElementType is an enum with the following options (mostly copy-pasted from https://docs.oracle.com/javase/tutorial/java/annotations/predefined.html):

  • ElementType.ANNOTATION_TYPE can be applied to an annotation type.
  • ElementType.CONSTRUCTOR can be applied to a constructor.
  • ElementType.FIELD can be applied to a field or property.
  • ElementType.LOCAL_VARIABLE can be applied to a local variable.
  • ElementType.METHOD can be applied to a method-level annotation.
  • ElementType.PACKAGE can be applied to a package declaration.
  • ElementType.PARAMETER can be applied to the parameters of a method.
  • ElementType.TYPE can be applied to any type declaration.

For example, to restrict @Author to types, annotations, constructors, fields, packages, and methods (the sensible items), you would define it like so:

import java.lang.annotation.*;
// ...
@Target({ElementType.TYPE, ElementType.ANNOTATION_TYPE, ElementType.CONSTRUCTOR, ElementType.FIELD, ElementType.PACKAGE, ElementType.METHOD})
@interface Author {
    String name();
    String date();
}

Now, if you try to, say, take undo credit for the creation of java.lang.String, the compiler will yell at you.

Using Annotations for Reflection

Now, we get to the part that justifies this post’s inclusion in a series entitled “Java Reflection Tutorial”. To use annotations for reflection, you need to use the Annotation interface (in the java.lang.annotation package, which should already be imported from Basic.java). To get started, let’s put Author into its own file. Call it Author.java, and put it in the same package as Basic.java:

import java.lang.annotation.*;

@Target({ElementType.TYPE, ElementType.ANNOTATION_TYPE, ElementType.CONSTRUCTOR, ElementType.FIELD, ElementType.PACKAGE, ElementType.METHOD})
public @interface Author {
    String name();
    String date();
}

If it’s in a named package, be sure to put a package declaration!

Now, let’s put an @Author annotation on Basic, to let the world know who wrote it. Put this on a line before the class declaration in Basic.java:

@Author(name = "Fozzie Bear", date = "Somewhere around 2021")

Now that the humans know, let’s make sure that the computers know as well. To get the Annotation instance for the annotation, we can use the Class.getDeclaredAnnotationsByType method. Since we know that we can only have one instance of the annotation on any given element (to repeat annotations, annotate the annotation declaration with @Repeatable), we can just take the first element of the returned list and cast it to Author: (put this at the end of main)

Author author = cls.getDeclaredAnnotationsByType(Author.class)[0];

However, if you try to run this (I did), you’ll find that the annotation doesn’t exist! This is because of retention policies.

Somewhat Unplanned Interlude: Retention Policies

Retention policies (defined using the @Retention annotation) tell the compiler how long to keep the annotation around for. A value of RetentionPolicy.CLASS (the default) tells the compiler to keep the annotation around during compilation, but ignore it at runtime. A value of RetentionPolicy.SOURCE tells the compiler to ignore the annotation altogether, and makes the annotation behave, for all intents and purposes, like a comment. A value of RetentionPolicy.RUNTIME, which is what we want, tells the compiler to keep the annotation around during both compile and runtime, for reflection purposes. To make @Author available for reflection, add a retention policy in Author.java:

// ...
@Retention(RetentionPolicy.RUNTIME)
// ...

And Now, We Return To Our Regularly Scheduled Programming

At this point, we’re retrieving the annotation class, but we’re not actually doing with it. To finish up, let’s print out the author and date from the annotation:

System.out.println("This class was written by " + author.name());
System.out.println("Date: " + author.date());

Now, if you run it, along with the output it previously gave, it will also print out the following:

This class was written by Fozzie Bear
Date: Somewhere around 2021

And we’re done! This tutorial just scratches the surface of what’s possible with annotations, though, so be sure to check out the official tutorial at https://docs.oracle.com/javase/tutorial/java/annotations/index.html.

An Exercise

Try making Author able to be used multiple times, and modify Basic.java to print out all of the occurrences. For instance:

@Author(name = "Fozzie Bear", date = "2021-09-08")
@Author(name = "Kermit", date = "2021-12-21")

And the output would be:

This class was written by Fozzie Bear
Date: 2021-09-08
This class was written by Kermit
Date: 2021-12-21

Java Reflection Tutorial, Part 1

This is a repost from our previous blog platform.

Jun 2, 2021 • Aleks Rutins

Java Reflection Tutorial, Part 1

First of all, this is the first time I’ve ever written a blog post. My apologies if the organization makes no sense.

Reflection in programming is the act of using code to write or read itself. For example, in Java, getting the name of a class or method at runtime is reflection.

In Java, most of the reflection classes and methods are in the java.lang.reflect package, and tools for dealing with annotations are in java.lang.annotation.

To get started, create a directory to hold files for this tutorial. Create a new basic Java file, and call it Basic.java:

import java.lang.reflect.*;
import java.lang.annotation.*;

public class Basic {
    public static void main(String[] args) {
        System.out.println("Hello Java Reflection");
    }
}

If you don’t know what that does, a comprehensive tutorial is here.

Run it with java Basic.java. You should see the output:

$ java Basic.java
Hello Java Reflection

Great! Your Java installation works. If it doesn’t, go ask the Oracle. Or ask OpenJDK, if you’re on Linux.

Getting the Name of a Class

Now, let’s do some reflection! Add some lines to main:

import java.lang.reflect.*;
import java.lang.annotation.*;

public class Basic {
    public static void main(String[] args) {
        System.out.println("Hello Java Reflection");
        Class<?> cls = Basic.class;
        System.out.println("The class's name is " + cls.getName());
    }
}

Run it again, and you should see this:

$ java Basic.java
Hello Java Reflection
The class's name is Basic

Whoa! How’d it know that? Let’s see.

First, take a look at this line:

Class<?> cls = Basic.class;

First of all, the ? in Class<?> tells the Java compiler to auto-detect the type argument. In this case, it could also have been written as Class<Basic>, but that would be more typing. I could also use var, which tells it to completely auto-detect the type:

var cls = Basic.class;

However, var is not supported in JDK 7, which is what FTC uses. If you have JDK 9 or higher, you can use var, though.

Next, Basic.class tells it to get the Class<T> (T is a type argument) instance for BasicClass<T> is core for reflection. So essential, in fact, that it is included in java.lang.

On to the next line:

System.out.println("The class's name is " + cls.getName());

Everybody should be familiar with System.out.println. If not, I urge you once again to check out this tutorial. However, cls.getName() should be new. If not, I urge you to skip to the next heading, wait for part 2 (annotations), or seek out a more advanced tutorial.

getName is a method on Class<T> that gets the qualified name. For example, if Basic were in the com.not.a.domain package, cls.getName() would return "com.not.a.domain.Basic". Since Basic is not in a package, it just returns "Basic". If you need an unqualified name, without the package, use Class.getSimpleName.

Getting the Name of a Method

To access methods, we use the Method type, which is in java.lang.reflect. Methods can be accessed using Class.getMethod or Class.getMethods, which return a specific method or a list of all methods in the class, respectively.

Add a method to Basic:

public void doSomething(String whatever) {
    System.out.println("Doing something very interesting...");
    System.out.println("Whatever is " + whatever);
}

Now, just to make sure it exists, create an instance in main and try it:

Basic basic = new Basic();
basic.doSomething("whatever");

Run it, and the whole output should be:

$ java Basic.java
Hello Java Reflection
The class's name is Basic
Doing something very interesting...
Whatever is whatever

It works! Now, let’s get a Method instance for that method. Remember, cls is Basic.class. The try block is necessary because getMethod can throw a NoSuchMethodException if the method was not found.

try {
    Method doSomething = cls.getMethod("doSomething", String.class);
} catch(NoSuchMethodException e) {
    System.out.println("A whatsit happened: " + e.toString());
}

Now, let’s look at the interesting line:

Method doSomething = cls.getMethod("doSomething", String.class);

If you look at the description for Class.getMethod, you can see that the first argument is the name of the method, and any remaining arguments are parameter types, as Class<T> instances. In this case, since the method is called doSomething and it takes one String argument, the first argument is "doSomething" and the second argument is String.class.

Now that we have the Method instance, it’s easy enough to get the name (inside the try block):

System.out.println("The method's name is " + doSomething.getName());

Now, the output should be:

$ java Basic.java
Hello Java Reflection
The class's name is Basic
Doing something very interesting...
Whatever is whatever
The method's name is doSomething

It worked!

If something went wrong, here’s the full code of Basic.java (organized into sections):

import java.lang.reflect.*;
import java.lang.annotation.*;

public class Basic {
    public static void main(String[] args) {
        // SETUP //
        System.out.println("Hello Java Reflection");

        // GETTING THE NAME OF A CLASS //
        Class<?> cls = Basic.class;
        System.out.println("The class's name is " + cls.getName());
        
        // GETTING THE NAME OF A METHOD //
        Basic basic = new Basic();
        basic.doSomething("whatever");
        try {
            Method doSomething = cls.getMethod("doSomething", String.class);
            System.out.println("The method's name is " + doSomething.getName());
        } catch(NoSuchMethodException e) {
            System.out.println("A whatsit happened: " + e.toString());
        }
    }
    public void doSomething(String whatever) {
        System.out.println("Doing something very interesting...");
        System.out.println("Whatever is " + whatever);
    }
}

See you in Part 2, which will go over annotations!

Other Notes & Exercises

  1. Try putting Basic in a package, and see what getName returns. Then, try to get the name without the package name.
  2. If you aren’t sure how to set up your IDE, I use Visual Studio Code with the Java Extension Pack.
  3. The java command-line tool, as used above, can also compile files on-the-fly. If you experience problems, you can use the longer version:
    $ javac Basic.java
    $ java Basic ...
  4. Use the documentation for Method to figure out how to get the name of the class that declared the method.